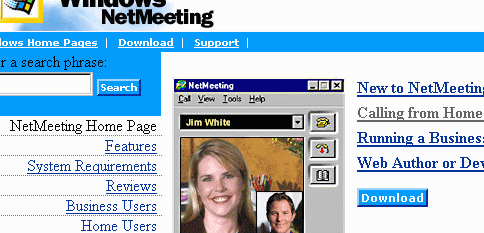
Microsoft NetMeeting 3.01
Download, Installation and How to Use Instructions
and How To Use
Net meeting on Peace-Cyprus.Org
(Adopted from instructions
at
Indiana University School of Nursing )
Microsoft NetMeeting is a free program that Microsoft Windows users can download and install to enable rich real-time communications with other NetMeeting users. This program is not available for Macintosh users. If you need to communicate with Macintosh users, they will have to download a H323 protocol compatible tool for Macintosh. Information about linux based tools will be available shortly too. You should also make sure you have a version of netmeeting that is current. You may otherwise experience some problems having a meeting with other people.
You may wish to print these instructions before you begin. This page is quite long, so it may take some time for all the images to load and for you to print everything.
Some instructions on these pages might be different from what you will experience due to differences in configurations. Please try to follow the instructions on your screen.
For best results you will need a full-duplex sound card with a microphone connected to it. You can test whether your microphone works by trying to record a short talk in 'Start-Menu --> Program Files --> Accesories --> Entertainment --> Sound Recorder'. You should be able to record and playback a file, also see on your screen that your sound is going through. This works for Ms-Win95/98 users.
STEP B - Download the free NetMeeting program for Netscape Users
1. If you are using Internet Explorer, skip to STEP C. If you don't know what browser you are using, click "Help" in the menu bar then "About ..." (this will be followed by the name of the program). This will tell you exactly what you are using.
2. Connect to the Internet as you normally would. Stay connected until you have gotten to the end of these instructions if possible. In order to use NetMeeting, you must be connected to the Internet.
3. Go to the following web site: http://www.microsoft.com/windows/netmeeting/
4. Click the "Download" button.

5. Select "NetMeeting 3.01 for Windows 95, 98 or NT 4.0" from the drop-down list if it is not already selected. Then click the "Next>>" button.
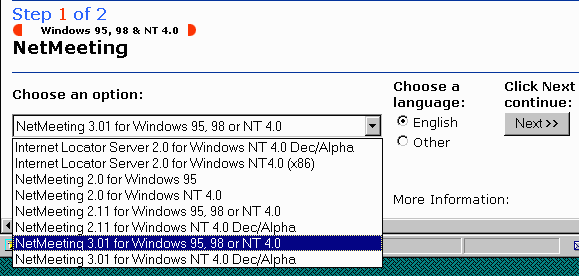
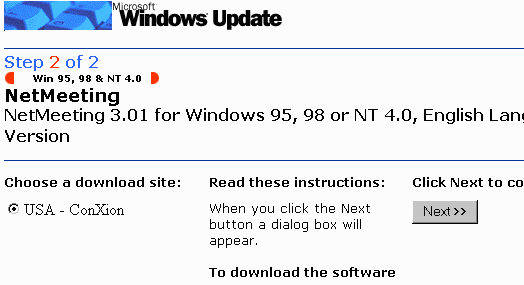
6. On the next screen, click the "Next>>" button to begin the download.
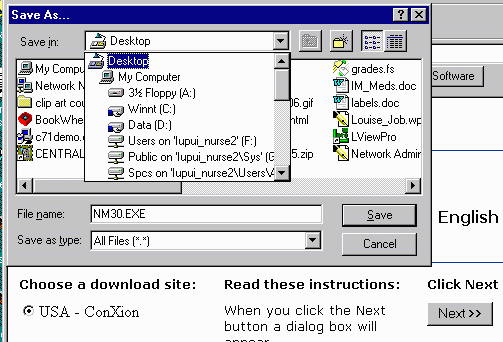
7. Netscape will ask you where you want to save the installation file (if for some reason it instead asks you if you want to run the program or save it, choose to run it--this may allow you to skip some of the next steps). (If you have an anti-virus program installed, it will actually download the installation file first, check for viruses, and then ask you where you want to save it!) Click the drop-down box next to "Save in:" to see a list of locations on your computer where you can save the file. Use the right scroll bar on this list to scroll to the top until you see "Desktop" displayed. Click on "Desktop" to select it. Remember the name of the file shown next to "File name:" -- it may be different than what is shown below. You will need to know the name of the installation file so you can find it later and continue with the installation. Click the "Save" button to save the installation file to your desktop.
8. You will see a dialogue box showing you the progress of the download (unless you have an anti-Virus software installed, in which case the file has already downloaded). The file size is approximately 1.6 MB in size, so over a typical modem connection to the Internet, this could take a long time to download. Be patient.
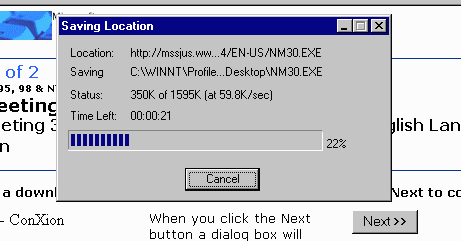
9. After the download is complete, you need to minimize all your open windows so you can see your desktop. To minimize your open windows, click the left-most button in the upper-right corner of each window to hide it (the button looks like an underscore character "_").

10. Find the installation file that you saved to your desktop (recall the name of the file from instruction 7 above). Double-click on this file to begin the installation process. Continue to STEP D below.

STEP C - Download the free NetMeeting program for Internet Explorer Users
1. Connect to the Internet as you normally would. Stay connected until you have gotten to the end of these instructions if possible. In order to use NetMeeting, you must be connected to the Internet.
2. Go to the following web site: http://www.microsoft.com/windows/netmeeting/
3. Click the "Download" button.

4. Click the "Download Now" button to begin downloading the installation file.
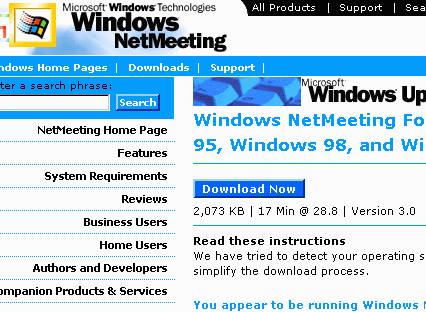
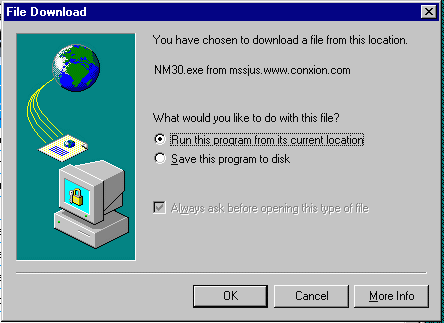
5. Select "Run this program from its current location" and click the "OK" button.
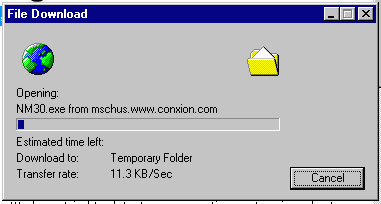
6. You will see a dialogue box showing you the progress of the download. The file size is approximately 2 MB in size, so over a typical modem connection to the Internet, this could take a long time to download. Be patient.
7. You will see a security warning like the picture below. Click the "Yes" button.

8. You have successfully downloaded the installation file! It will launch automatically, so continue with STEP D below.
STEP D - Install Microsoft NetMeeting
1. After downloading and launching the installation file, you will be prompted whether you want to install the program or not. Click the "Yes" button.

2. Read the license agreement, then click the "Yes" button if you agree to the terms of the license.
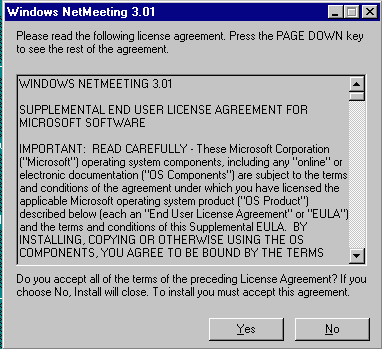
3. At this point, if you receive the message, "Internet Explorer 4.0 or later must be installed on this computer before you can install this version of NetMeeting", click OK. You must have IE 4.0 or greater installed on your machine. . You can download the latest version from http://www.microsoft.com/ie/
4. After extracting the installation files, the program will prompt you where you want NetMeeting installed. If you don't like the default location, click the "Browse..." button to choose a different location. Click the "OK" button to accept the default location.
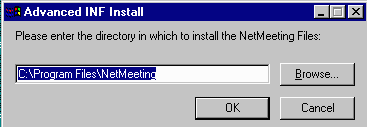
5. If the installation folder does not exist, you may receive a prompt like the one below. If so, click the "Yes" button.

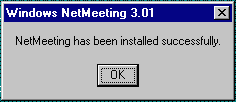
6. The program will install, and when it is finished you will see the following prompt. Click the "OK" button. Netscape users may wish to delete the original installation file downloaded in STEP B, instruction 7 above. This file is no longer needed and will just take up space on your hard drive unless it is deleted.
STEP E - Starting NetMeeting for the first time
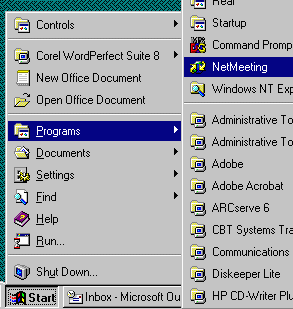
1. To start NetMeeting, click the "Start" button on your task bar, then click "Programs" and finally "NetMeeting." If you are using Windows 98, this icon will be inserted at the very bottom of your list of programs, so you may need to point to the arrow at the bottom of the list to scroll down and find it.
2. Click the "Next >" button.
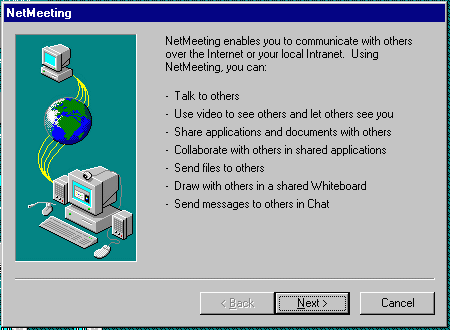
3. The following prompt gives you information you need to know in case you plan to share applications with other NetMeeting users. It is not likely you will need to use this feature, so you do not need to worry about this. Click the "Next >" button to continue.
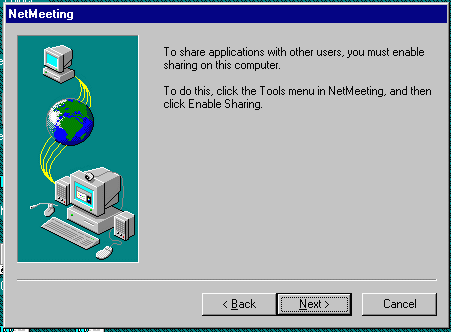
4. In the next dialogue box, fill in at least the first three fields. Click the "Next >" button when you have finished filling in the required information.
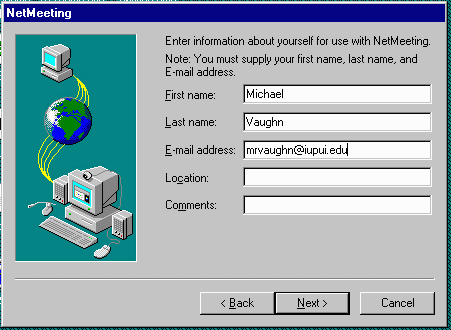
5. On the next screen, be sure that "Log on to a directory server when NetMeeting starts" is *not* selected. Unless you have a favourite ILS server to use in which case you should type in the name of the server.Be sure that "Do not list my name in the directory." is selected to protect your privacy.. Click the "Next >" button.
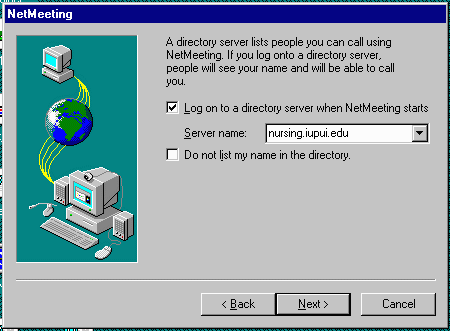
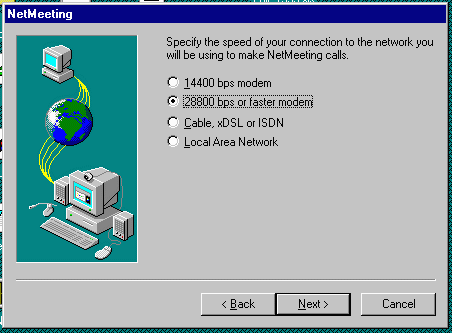
6. Click the radio button next to the speed of your Internet connection. If you are connecting to the Internet from home using a modem, you probably should select "28800 bps or faster modem". If you are in an office or school lab that has a high speed connection to the Internet, you should probably select "Local Area Network". Click the "Next >" button.
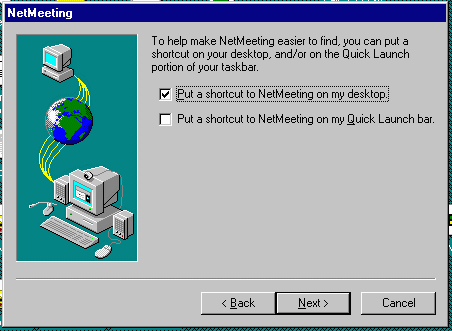
7. On the next screen, check "Put a shortcut to NetMeeting on my desktop" if you want a shortcut to the NetMeeting program put on your desktop to make it easier for you to start NetMeeting. Click the "Next >" button.
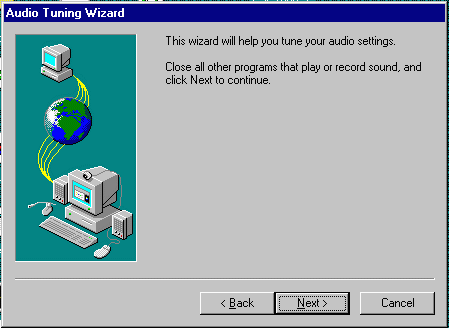
8. The next few screens could vary depending on the type of audio and video hardware you have installed on your computer. If your screens do not look like those depicted here, just be sure to follow the on-screen instructions to the best of your ability and to continue with these instructions when your screens match those shown here. The NetMeeting installation will launch the Audio Tuning Wizard next to adjust your audio properties (provided you have a sound card installed). Be sure to close any programs that play or record sound before continuing. Click the "Next >" button.
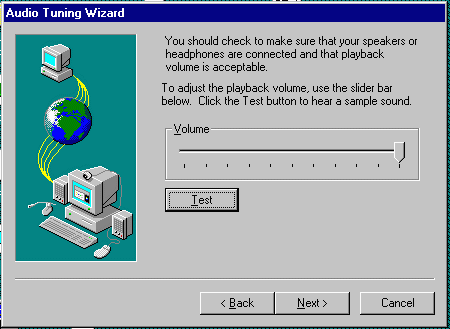
9. The next screen allows you to adjust the volume setting on your computer. Move the slider bar to adjust the volume, then click the "Test" button to test the volume. When it is set to your liking, click the "Next >" button.
10. The next screen is used to adjust the recording level of your microphone. If you do not have a microphone attached to your computer, do not fret. You can still use the text chat and whiteboard features of NetMeeting, so you will not need a microphone. Click the "Next >" button.
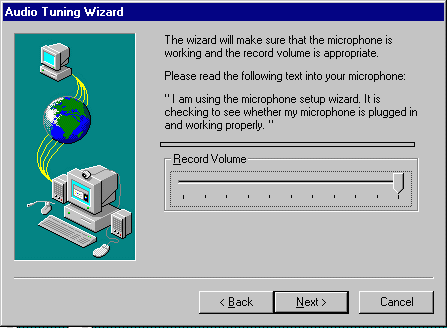
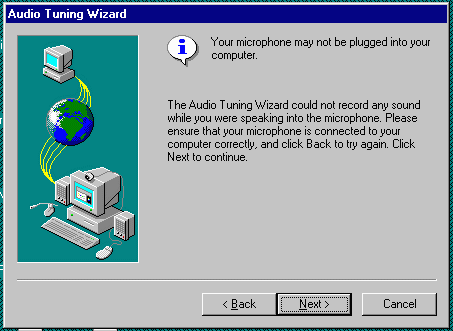
11. If you do not have a microphone plugged in or it is turned off, you may receive the following dialogue box. Don't worry about this. Click the "Next >" button.
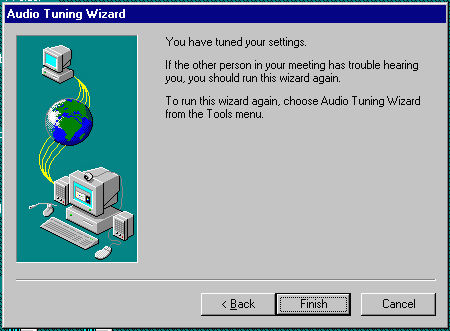
12. On the next screen, click the "Finish" button to close the Audio Tuning Wizard and to start NetMeeting.
13. NetMeeting will start and looks like the picture below.
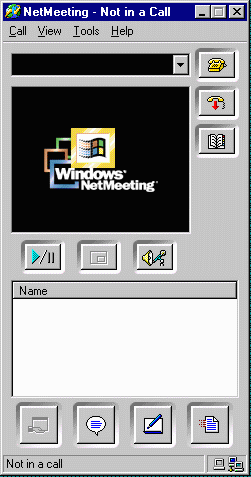
14. There are multiple ways to start a call. Here we assume that you would want to do an 'IP-to-IP' chat (IP in simpler terms numerical description of your machine.) . On a windows machine you can find your IP address by going to 'Start-Menu --> run --> winipcfg' which should give your IP address in the relevant field. If you see all zeros there, go to the pull down menu and see if you have another adaptor installed. For dial-in connections this will be a PPP-Adapter. An IP address would look like 165.123.26.34. Now you are ready to receive a call. Send your IP address to the person you would like to have a audio/video conference with. On top , right below the menus and to the left of the little 'telephone icon' there is an empty box where IP address can be typed. After typing the IP address of the person you would like to talk to press 'play' button below the dark netmeeting window.
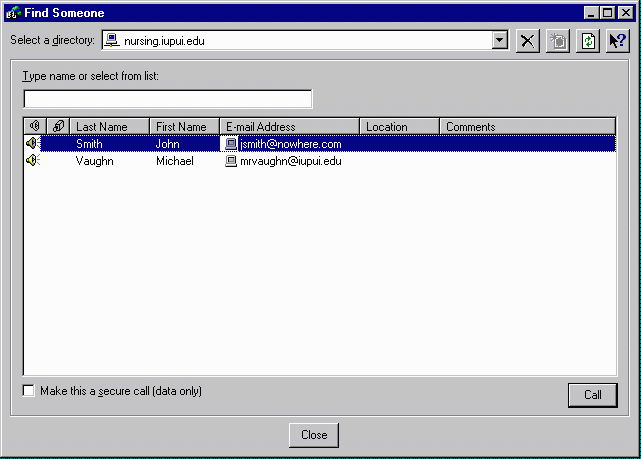
16. After doing this, they will be prompted with a ring and asked to accept your call. You will see an indication that the person is being called and that NetMeeting is waiting for a response. If the person you are trying to call does not respond within a few seconds, the operation will be cancelled. You should then try to call again, or try calling a different person. If you receive a call from someone, you will hear a ringing sound and be prompted to accept the call. Click the "Accept" button to allow the person to join your chat (not pictured here, but it will be very obvious to you when someone is trying to call).

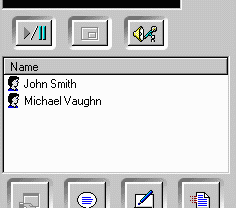
17. Once the call has been accepted, you should see a list of everyone in the call in the NetMeeting window.
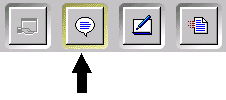
18. To begin a chat, click the Chat button, which is the second button of four buttons along the bottom of the NetMeeting window (highlighted below). If the other person or persons you are calling are already using Chat, it will open automatically for you so you will not need to click the Chat button.
19. The Chat window looks like the picture below. Simply type a message in the "Message:" box, then press Enter to send the message to everyone in the chat room. If you want to send a private message to someone in the chat room, select their name using the drop-down list under "Send To:"

20. If you wish to use the Whiteboard tool to share drawings with others in the call, from the main NetMeeting window, click the third button of the four buttons along the bottom of the NetMeeting window. Like the Chat tool, if someone opens the Whiteboard this will automatically open the Whiteboard for everyone else in the call. Don't open these tools unless you intend for everyone to use them.
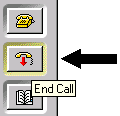
21. When you are done with your chat and/or whiteboard, simply close the chat or whiteboard window. You will be prompted whether or not you want to save the chat text or whiteboard image. To hang up, click the "End Call" button which is the second of the three buttons on the right side of the NetMeeting window (highlighted below).
NOTES: